What do you do when the shift capabilities of your DSLR T/S lens is not enough to include the top of a building or cliff like Half Dome from a strategic point of view?
You might combine full shift on a lens like the Canon 45T/S AND tilting it up some too. Then you correct the slight tilt in PS. By my tests that is a better technique than using a regular lens and doing all the perspective correction in PS with all the cropping and interpolation that involves. I use this compromise technique all the time as DSLR T/S lenses have limited rise compared to view camera lenses which I used exclusively for 28 years.
Or you may consider using a slightly wider lens and cropping the bottom some, like a 35 perspective correction lens. Even though the shift may not be greater (10.4mm to each side, 12mm up and 13mm down according to one source on the web for an Olympus), the greater field of view at full shift may give you the rise you need. For example I use a vintage Olympus 35PC with an EOS adapter to fill the gap between the Canon 24 and 45 T/Ss. Most examples of that lens are very good and some are superb. Composition when tilting for perspective correction in PS requires some forethought as you end up effectively cropping a thin triangle from each upper corner of the image. These cropped areas must be pre-visualised when composing in the field as, in my early days with DSLRs, I ran into trouble by not including enough room on the sides to accommodate the PC cropping.
Thursday, June 18, 2009


Stitching Strategies
Hello Kirk,
I've heard about you from Dan Burkholder some time ago. I have been involved in architectural photography and currently using digital capture with DSLR, HDR and stitched HDR, QTVR. I'm wondering if you use a spherical qtvr head such as the 303SPH or the dedicated heads made by Precision to accomplish your stitching without any nodal displacement. I've been struggling with getting my DSLR capture to do what my 4x5 lenses could easily accomplish with interiors. Sorry to bother you, I didn't know how to approach this question on the blog, which I find very beneficial to the craft btw.
I'm using PT Gui for my stitching and Bracketeer for my HDR blending in batch mode. I like the HDR to be calm and frequently use it as an ambient exposure for interiors that I blend with my strobe exposures.
I'm interested in your approach of course, but understand if you have not time to spare.
best,
T
T,
Thanks for the question. No I don't use anything like a spherical qtvr head for architecture, though I do own a Nodal Ninja. Generally the problem I am tying to solve is that sometimes the field of view of a 24mm lens on a FF sensor is simply not wide enough and wider lenses give significant distortion of near objects. Many people overdo wide stitching for architecture creating images that are very distorted and don't even resemble the original architecture. So I use a 24mm Tilt/Shift lens. I shift it left for one tile of the stitch and shift it the other way for the other tile. The combined images increase the field of view by 1/2. Any more would result in a very unnatural look, which I know from experience is virtually worthless to my clients. I then use the Photomerge plugin in PS CS4 to join the images. It is a very simple and effective workflow, that produces believable images. PtGui is more than I need for my stitching. I have not tried Bracketeer, but I do use Exposure Blending in Photomatix some. I find this less effective than simply lighting a space properly to begin with or manually layering and masking two exposures (one for the interior and the other for the exterior) in PS, but sometimes useful in a space that is highly reflective and there is nowhere to hide lights.
Kirk
Monday, June 15, 2009
Nikon PC lens to Canon EOS body adapter etc.
Dear Kirk,
Thank you for all the information that you are sharing, I am starting as an architectural photographer here in the far east and now spending a lot of time shooting in India. I am a keen follower of your blog and other writings and am also inspired by your body of work.
I have a query that i hope you can help me with. Currently I am shooting with a D700 and have 3 lenses, 14-24, 24-70 & 70-200, I also recently acquired the 24PCE Nikkor which i seem to be using almost 80% of the time. D700 being 12mp, 4256 x 2832 pixel at 300 dpi is only 14.19" x 9.44" print size, I shoot for architectural firms that have intentions of publishing coffee table books in future and I am concerned that my files sizes may not be sufficient. Hence, I am considering getting the 5dM2 (I cant afford the D3x unless a D700x is on its way) and adapting the Nikkor 24PCE to work on the 5Dm2, firstly will this work? Secondly do you think this is a good idea? I would love to hear your comments. Thanks H
H Thanks for the question,
IMO s 21-24 megapixel camera is ideal for all periodical work. It covers a double page spread without uprezing. So theoretically your idea is sound BUT the adapter you need (to put the nikkor T/S on a Canon EOS body) has not been made yet....as far as I know. The mount on the Nikon 24 PC E is totally electronic with no mechanical aperture connection. This leaves you with no way to control the aperture when used on a Canon. I heard someone was working on an adapter, but I have never seen it in production. So either wait for the Nikon 700x 20+ MP body or go completely Canon (using their new 24 T/S which I have not been able to test yet). Understand I have been carefully using a current Canon 24 T/S for all my professional work for a couple of years now with zero complaints from print clients (book, magazine or any other clients and publication of my work has skyrocketed the last few of years.) . BUT I want more quality and if the new lens is all it is cracked up to be, I will buy it.
Dear Kirk,
Thanks for your insight. I could close the diaphragm of the 24PCE on my D700 and set the aperture manually with the aperture ring control on the 5Dm2 but that would mean only stop down metering like the old Nikon 28PC. Going completly canon seems a bit difficult for me since i have so many Nikon glasses. I too have used the 24T/S on a 1DSM2 earlier and a PC24Oly adapted on the same canon. I find the Nikkor 24PCE much much better at handling CA when shifted majorly and also find the lens to be sharper. I havent come across the new Canon 24 T/s. If only i can borrow a 5Dm2 i could test the nikkor before spending the $$$..
Regarding Uprezing, is it better to do this using GFractals or within ACR while opening a Raw file? Can one save an uprezed file in Gfractals to a high res tiff image that can be handed over to Clients?
Do you still shoot film? I occasionally still take my 4x5 walker along for some key shots> i have been exploring MF options but the digital backs together with the digitar lenses seem really to expensive at this point...
Thanks once again!
H, Trying to use a lens in that manner on a job would be painful IMO. The Nikon is better than the current Canon by my tests, but not dramatically so (see also Canon vs. Nikon). If I was buying into a new system I would wait to see what the new Canon is like (see also New Canon Lenses). As far as uprezing goes, I used to use Genuine Fractals for uprezing. I haven't found it necessary so far wit the 21MP Canon 5D MII. By my tests GF is slightly better than using ACR and yes you can save 16 bit tiffs from GF. see also Genuine Fractals
I do still shoot 4x5 b&w film in a Phillips (great camera, similar in design to the Chinese Chamonix which ripped Dick Phillips off) for art prints, but never for commercial work anymore. I love the tradition!
Tonnes,
Folks are starting to report excellent performance with the new Canon 24mm tse 2: http://tinyurl.com/na8nkz
Sunday, June 7, 2009
Bicycle Sprints and shooting

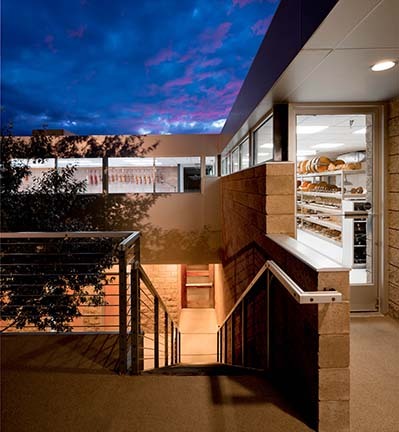
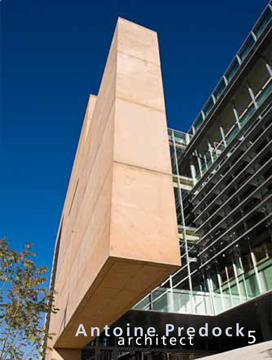
A bicycle as a lighting tool? Its a first. These days with many architects, builders and owners seeking LEEDS certification, many room and accent lights are motion activated to save energy. On this building, by Antoine Predock FAIA and Jon Anderson AIA, the exterior bollards were motion triggered and would only stay on for about 60 seconds. Walking the route and setting them off took too long. The solution? Jump on my mountain bike and sprint along the bollards. Race back to the camera, handing off the bike to my assistant running and quickly making two exposures (in this case a horizontal stitch). It worked like a charm-new conditions=new solutions. On another recent shoot, a large office building where all the room lights were on sensors, it was proposed by the architect to bring his kids on the shoot so they could run from room to room triggering the lights. What else could you do? There is no override for these sensor systems. In that case however, I decided to photograph a smaller section of the building as a twilight so the kids were unnecessary. Other thoughts? Remote control cars? Have enough of them for every room-all on the same frequency so one control can move them all simultaneously? Trained gerbils? Release a dime store parakeet in each room and close the door? Someone on the LF Forum suggested fans with balloons tied to them.
Enough fun, I'm thinking of a small oscillating fan with a ribbon tied to it. I like the fan idea, perhaps a small cheap oscillating type, but I think I will test it with a piece of crepe paper or ribbon attached rather than hassling with balloons. Something like this:
Oscillating Fan
I will let you know whether it works.
Tuesday, June 2, 2009
Nick Merrick at the Santa Fe Workshops.

© Nick Merrick
Nick is one of the greats. I have had the unique opportunity to be hired twice to photograph the same buildings he did. This gives one the ability to experience how another photographer actually sees and solves problems in the field. It was instructive, even humbling. His technical approach is masterful and his vision is extraordinary. The workshop should be illuminating. If you are thinking of going professional or a professional who wants to upgrade their skills, I wouldn't miss it. He will be teaching an Architectural Photography Workshop at the Santa Fe Workshops on July 5-11. See:
Nick Merrick in SF
Saturday, May 16, 2009
Strobe or Halogen? (flash or hot lights?)
Dear Kirk,
I am a young photographer who has been shooting architectural work for a short while. I have sent you this email because you are a noted architectural photographer and I figured you could give me a dependable answer. I have very basic knowledge of interior lighting, but wonder which is better using strobes daylight balanced or hot lights with quartz halogens. I have been asked to shoot an interior with a large glass curtain wall on one side and several banks of flourecents on the other and possibly some tungsten accent lights. So for me I am unsure what would work best. I realize that this may not have a simple answer but would appreciate your suggestions.
Yours truly,
Mike
Mike, this is a big question that is hard to answer without seeing the space. But here are some thoughts.
Are you shooting digital? Digital is more forgiving and easier to adjust color temperature in mixed light situations. Your example sounds like a situation where I would use strobe (which is daylight balanced) for fill light, if I was shooting it in the daytime (at night I might choose halogen fill). The warm accents from a few small halogens can look good and natural in a strobe lit daytime interior. The glass in the curtain wall commonly has a slight green cast. This will make daylight coming through the glass more like the color of the fluorescents if they are cool whites. It may be useful to put a light green filter on the strobes to make a color match between the daylight coming through the glass and the cool white fluorescents and then do a custom white balance to neutralize these three main sources. A 1/4 Rosco + green filter is usually good (see B&H)
Final tweaking of the color can be done in Photoshop by many means. An easy one is the plugin Color Mechanic Pro . CMP is good for small adjustments in color. If you try to over do it you will get pronounced noise in the transition areas.
Monday, April 27, 2009
Sacred Places Poster
Over the years, some of the most satisfying work I do is for historic preservation. Sometimes this is in the form of documenting threatened structures, sometimes a HABS report (Historic American Building Survey) and sometimes it is simply contributing my work to benefit historic preservation organizations and projects. In this situation it is the annual poster for New Mexico Historic Preservation Month of the New Mexico Heritage Preservation Division, Office of Cultural Affairs. The image they selected for the Sacred Places theme is of the Upper Morada in Abiquiu, just up the hill from Georgia O'Keefe's house. The image is from 4x5 Tri-X Professional pack film developed in HC 110, "The Way of the Cross", Upper Morada, Abiquiu, New Mexico, 1988. This was printed with a very strong duotone colorization from a monotone print file, designed by Tom Drake.

I will be signing these at the Heritage Preservation Awards Ceremony this Saturday at the Santa Fe Convention Center 2-5pm.
Interesting question about aesthetics and historic preservation in New Mexico from a duplicate post at another forum.
FWIW, I used to be a member of a committee for historic preservation with the Archdiocese of Santa Fe. The Ranchos de Taos church was within our jurisdiction. As the church restoration and maintenance is done by local volunteers with donations, the committee was not likely to intervene unless something unsafe was being done. The locals' priority was always very pragmatic. I felt like I was the sole person concerned with aesthetics (for obvious reasons) and frankly aesthetics were a very low priority for the committee as a whole considering the magnitude of the structural issues etc. A few classic churches collapsed in the 70's and 80's. There were some 800 historic churches in the A of Santa Fe and resources were very low and spread very thin.

I will be signing these at the Heritage Preservation Awards Ceremony this Saturday at the Santa Fe Convention Center 2-5pm.
Interesting question about aesthetics and historic preservation in New Mexico from a duplicate post at another forum.
"Kirk, Splendid stuff. Anyone ever figure out why they put that gas meter on the side of the church at Ranches de Taos? I, along with millions of others, have pictures of that church going back to the early sixties. It never ceases to amaze me that they did that. It's hardly what I'd call historic preservation."
FWIW, I used to be a member of a committee for historic preservation with the Archdiocese of Santa Fe. The Ranchos de Taos church was within our jurisdiction. As the church restoration and maintenance is done by local volunteers with donations, the committee was not likely to intervene unless something unsafe was being done. The locals' priority was always very pragmatic. I felt like I was the sole person concerned with aesthetics (for obvious reasons) and frankly aesthetics were a very low priority for the committee as a whole considering the magnitude of the structural issues etc. A few classic churches collapsed in the 70's and 80's. There were some 800 historic churches in the A of Santa Fe and resources were very low and spread very thin.
"If you look at Ansel's 1929 shot you can see how beautiful this building was before it was vandalized."I wouldn't call it vandalized. It was simple pragmatism. The gas line runs straight from the street to that wall. The west buttress would have been the absolute nearest point but the wall at the base of the buttress is like 10' thick. So the next closest is the wall to either side of the west buttress. The buttress itself was not built for aesthetic purposes. It was simply to keep the back of the church from collapsing. To them it solved a problem. To us the buttress is pure sculpture. Pragmatic architecture is sometimes exquisitely simple and beautiful like the buttress and sometimes it is awful like the gas meter. The beauty of the back of the building is our preoccupation. Their preoccupation is the structural integrity of the church. Who has the higher purpose? I would argue that they do.
Wednesday, April 22, 2009
The Art of Architectural Photography: Pueblo Bonito Ruins


I was working on a file of an art print for a client today and I thought the transformation would be instructive. The top is the original scan and the bottom is the finished file. "The Memory of Form", Pueblo Bonito, New Mexico 1984 (shot on 4x5 Tri-X with a #15 orange filter, developed in HC 110, scanned on an Imacon 949).
The manipulations involved are to make the print represent my feelings about the scene beyond what the scene looked like. The manipulations add drama, depth and balance to the print.
For the final print the sky has been darkened and contrast added with a double softlight gradient which has been sculpted in the layer mask to fit around the escapement. The tone and value of the ruins in the foreground have been lowered with a curve adjustment layer (sculpted in the layer mask to fit the top edge of the ruins) to separate it from the canyon wall. The bottom right hand corner has been burned in with an art history brush (linear burn mode) from a snapshot. Some additional local enhancement of the tones in the clouds and sandstone were done in this same manner. The final file has 6 adjustment layers.
For years I produced a similar traditional silver print by careful burning and dodging on graded papers like Zone VI Brilliant (see below). But with digital printing I can get the midtone contrast I like while preserving better shadow detail. Thisprint will be available this fall at the Albuquerque Museum special 2009 Minatures Show.
.

Tuesday, April 21, 2009
Pet Peeves
"Your photograph looks like a painting........."
However well intentioned, statements like this are derogatory to old school photographers like myself who suffered through the days when photography was not broadly accepted as a fine art medium (I was around for the tail end of this in the late 60's).
Photographers in the first half of the century struggled long and hard to free itself from the perception that it was just the poor stepchild of painting and develop a uniquely photographic aesthetic. Remember F/64? Suggesting that imitating painting contains some higher aesthetic purpose for photographers is a very antiquated and long ago discarded idea.
However well intentioned, statements like this are derogatory to old school photographers like myself who suffered through the days when photography was not broadly accepted as a fine art medium (I was around for the tail end of this in the late 60's).
Photographers in the first half of the century struggled long and hard to free itself from the perception that it was just the poor stepchild of painting and develop a uniquely photographic aesthetic. Remember F/64? Suggesting that imitating painting contains some higher aesthetic purpose for photographers is a very antiquated and long ago discarded idea.
Inexpensive 4x5 Digital Solutions?? A follow up.
David wrote:
David, Yes I do 2x stitches with a shift lens weekly for various commercial and personal projects. BUT that is not going to get you the 4x5 quality you are talking about. For example the native resolution of a 21MP 5DII at 300 DPI is 12.48x18.72". Double that (less overlap) for a 2X stitch. I guessing you would need a 4x stitch to approach the quality you need at the size you need.
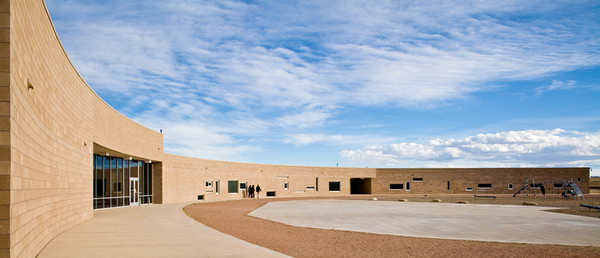
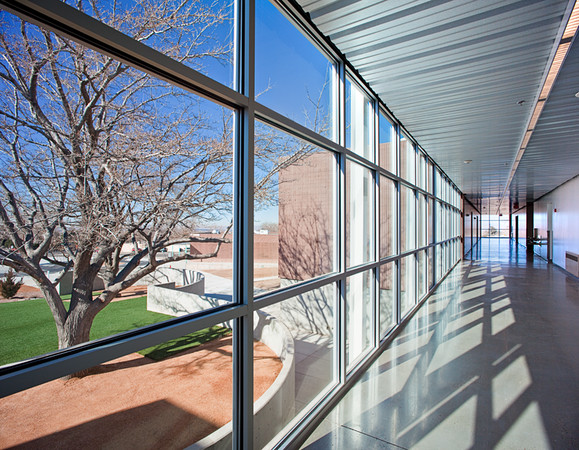
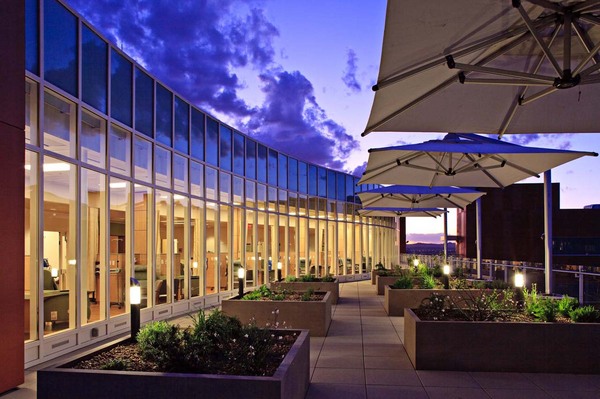
The above image is of the curved west elevation of the Discovery Canyon school in Colorado Springs by Antoine Predock. I could have shot this with a very wide lens and cropped it to this format, but that would entail throwing away almost half the file. By stitching two frames together, I was able to produce a much higher quality file. FWIW, I find the stitching program in Photoshop CS4 to be sufficient for these kinds of simple stitches. The falloff in the outer top corners from the shift is easily correctable unless you really racked the lens out to its limits both directions, which I don't recommend. The image below is from 3 vertical shifts. It a school building by RMKM Architects in Albuquerque. Stitching is a regular part of my practice.
Thanks so much for taking the time to respond to my inquiry.I have looked into the Betterlight backs but unfortunately they are pretty limited in terms of exposure times, so won't really suit the long time exposures (up to 30 minutes) of my current project. However it is good to hear the quality is good so they are certainly a possibility for future projects. The stitching approach is certainly an alternative that I will keep in mind - there are even some fairly inexpensive VC adaptors for Canon DSLRs which might make it affordable. And then a simple alternative with the DSLR would be a T/S lens which would allow stitching two frames together - have you ever done this?
David, Yes I do 2x stitches with a shift lens weekly for various commercial and personal projects. BUT that is not going to get you the 4x5 quality you are talking about. For example the native resolution of a 21MP 5DII at 300 DPI is 12.48x18.72". Double that (less overlap) for a 2X stitch. I guessing you would need a 4x stitch to approach the quality you need at the size you need.
The above image is of the curved west elevation of the Discovery Canyon school in Colorado Springs by Antoine Predock. I could have shot this with a very wide lens and cropped it to this format, but that would entail throwing away almost half the file. By stitching two frames together, I was able to produce a much higher quality file. FWIW, I find the stitching program in Photoshop CS4 to be sufficient for these kinds of simple stitches. The falloff in the outer top corners from the shift is easily correctable unless you really racked the lens out to its limits both directions, which I don't recommend. The image below is from 3 vertical shifts. It a school building by RMKM Architects in Albuquerque. Stitching is a regular part of my practice.
Monday, April 13, 2009
Inexpensive 4x5 Digital Solutions??
From David, an accomplished artist, whose subject matter includes architectural details:
An oxymoron at best, inexpensive 4x5 digital solutions? Basically the backs and the cameras are very expensive so lets look at how to utilize your existing 4x5 view camera and lenses. A couple of options come to mind. "Affordable digital capture of 4x5 quality" is a tall order. From what I know of David's work the subject matter is rather static. That makes both stitching and scan backs an alternative. I would look at refurbished or used Betterlight scan backs (which is slightly smaller in capture area than 4x5 film) used in a normal VC. I have played with one and have a friend who owns one and the files are impressive even with non-didgital lenses. The more expensive ones far exceed anything you can get from scanned 4x5. According to an email from the sales manager:
Then there is the Quad Stitch Back for use with some very solid view cameras. I have no personal experience with these. With four stitches even from a refurbished 22MP back you can get 4x5 quality (requires true digital lenses for optimum performance).

See also: From 4x5 to DSLR
and Medium Format Digital
I do optical C prints [from color negatives] to 40x50 but because of publications I am scanning now as well. I am reaching the "digital divide", was wondering if you have any thoughts on (affordable) digital capture at low light levels that would reach 4x5 quality?
An oxymoron at best, inexpensive 4x5 digital solutions? Basically the backs and the cameras are very expensive so lets look at how to utilize your existing 4x5 view camera and lenses. A couple of options come to mind. "Affordable digital capture of 4x5 quality" is a tall order. From what I know of David's work the subject matter is rather static. That makes both stitching and scan backs an alternative. I would look at refurbished or used Betterlight scan backs (which is slightly smaller in capture area than 4x5 film) used in a normal VC. I have played with one and have a friend who owns one and the files are impressive even with non-didgital lenses. The more expensive ones far exceed anything you can get from scanned 4x5. According to an email from the sales manager:
Kirk, All of our systems out shoot 4x5… provide higher information densities and
greater accuracy than could ever be expected from 4x5 Ektachrome films.
Our most popular and versatile model is our Super 6K-HS which sells for
$14,995.00 but right now I have two other models that may serve your needs.
We have one 4000-HS and a number of 6000E-HS’s available, all for $9,995.00.
The differences between these two systems is:
- the resolution, 3750 x 5000 vs. 6000 x 8000
- the sensitivity, ISO 200 vs. ISO 100
So the trade off for the same price is greater resolution vs greater
sensitivity. If your shooting mostly in standard daylight situations the
lower ISO shouldn't be a bother, but for a successful commercial photography
the right choice would be a Super 6K-HS.
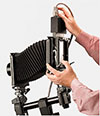
Then there is the Quad Stitch Back for use with some very solid view cameras. I have no personal experience with these. With four stitches even from a refurbished 22MP back you can get 4x5 quality (requires true digital lenses for optimum performance).
See also: From 4x5 to DSLR
and Medium Format Digital
DSLR vs. 4x5 Again
From ED, a very experienced view camera user who does documentary fine art photography:
Yes for a few images I have. I try to always have a digital camera with me (5DII these days) so that I never miss an opportunity. I know I can make a small exhibition quality image at least from a single file and much bigger if I can stitch. Hauling around a view camera is a hassle and a joy. I love the tradition and how deliberate and contemplative the VC work method is.
See also: From 4x5 to DSLR
This weekend, after printing a really nice black and white 8x10To me at 16x20 from anything less than a 2x stitched file from a DSLR starts to look thin especially if there is sky involved. The lack of micro fine detail combined with the lack of grain makes DSLR files at this size look mushy and plastic on close inspection. This is especially true if the file has been worked allot to expand contrast and tone resulting in enhanced noise. Noise is bad where grain is good. Having said that I have made 20x24 b&w prints from heavily detailed (stone wall) 12MP 5D files that look very good. Knowledgeable photographers at the show thought they were from 4x5.
from a crop of a D700 file, I was thinking...... are we getting to the point where it is hard
to justify 4x5 if our universe of prints is in the 16x20 range?
Are you tempted to shift to digital for your personal work? With shiftlenses and multi-exposures to deal with dynamic range, will it work aswell? I still like the 4x5 because I can see what I am doing much betterthan with a 35mm. I tried a 6x9 view camera with a MF back in a workshop, and that was the worst - you could not see as well as with the35mm because of the slower lenses, and it cost the earth. But you know the hassles of hauling around 4x5.
Yes for a few images I have. I try to always have a digital camera with me (5DII these days) so that I never miss an opportunity. I know I can make a small exhibition quality image at least from a single file and much bigger if I can stitch. Hauling around a view camera is a hassle and a joy. I love the tradition and how deliberate and contemplative the VC work method is.
See also: From 4x5 to DSLR
Wednesday, April 8, 2009
Uprezzing-Genuine Fractals
I avoid uprezzing like the plague, which is why I invested in a 21MP full frame camera, which gives me a native resolution of 12.48"x18.72" at 300 DPI. This is plenty resolution even for a double page spread of 10"x18" like the Su Casa magazine shown bellow or even for a "cover crop" from a horizontal image. I strive for top quality which usually means using a camera who's native resolution is capable of full filling my clients image size requirements without up sizing the file. Having said this, occasionally you just have to uprez and this morning was a good example. A magazine client wanted to use a pretty significant crop of one of my images on their cover. So uprezzing the file 150% became necessary. A couple of years ago I tested most of the options out there, including Photoshop tools and the options available in Camera Raw during conversion. I found the PS plugin Genuine Fractals to be slightly superior to all other alternatives in terms of image quality. See: Genuine Fractals 6. As a matter of fact with enlargements up tp 200% GF delivers a file that is hard to tell from the original. Here is the original.

Here is the proposed significant crop. Ironically the cropped image is very similar to version I proposed to do at the shoot:

More illustrations to follow....

Here is the proposed significant crop. Ironically the cropped image is very similar to version I proposed to do at the shoot:

More illustrations to follow....
Monday, April 6, 2009
Assignment Notes-ASMP's Pamphlet "Working with an Architectural Photographer"
A overview useful for novices both clients and photographers:
Working with an Architectural Photographer
Working with an Architectural Photographer
Wednesday, April 1, 2009
My Portfolio-Fraction Magazine #6
Sorry so many posts are to do with my own PR. It has been keeping me very busy of late with more to come.
The fine online magazine, Fraction, did an issue on New Mexico photographers and included a nice little portfolio of my work, much of it vernacular and prehistoric architecture. Many thanks to editors David Bram and Joshua Spees. All of the work is 4x5 except the color interior which is a 5D stitch. See:
Fraction
Issue #6
This image is of the Cadillac Ranch in Amarillo designed by the Ant Farm.

Quote:
Fraction
Issue #6
The fine online magazine, Fraction, did an issue on New Mexico photographers and included a nice little portfolio of my work, much of it vernacular and prehistoric architecture. Many thanks to editors David Bram and Joshua Spees. All of the work is 4x5 except the color interior which is a 5D stitch. See:
Fraction
Issue #6
This image is of the Cadillac Ranch in Amarillo designed by the Ant Farm.

Quote:
| Issue 6 is now up and running. Issue 6 focuses on some of our local New Mexico photographers. New Mexico has a long history of photography and photographers, from Ansel Adam's visits, to Laura Gilpin, and Elliot Porter. New Mexico has been an inspiration to many and we wanted to dedicate an issue to some of the photographers living and working in the state today. The issue includes work from Jeff Willis, Jim Stone, Debbie Fleming Caffery, Kirk Gittings, and Carlan Tapp. Two new book reviews are up and check out David Bram's APUG group show which went up last month as well as Melanie McWhorter's Dress Show if you haven't already seen them. We have a lot more planned over the next couple of months including a new group show next month and our ONE YEAR ANNIVERSARY issue due out in May. That one should be a blow out as we have a lot planned for the issue. Also coming up we are going to be adding some books to the blog. We have been getting more and more books in the last few months to review and some are slipping through the cracks due to our lack of time available for reviews so we will be posting some great books on the blog to give you a chance to check them out. Enjoy Issue 6 and as always thanks for looking. |
Issue #6
Subscribe to:
Posts (Atom)


 Posts
Posts

